Every Tool You’ll Need For a Hardwood Flooring Installation
If you’re installing your own hardwood flooring for the first time, all the tutorials and instructions could be a bit overwhelming. What does that tool look like? What does it do? Do I really need this tool? Does this set of instructions cover all the tools I’ll need?
It can be a little frustrating and time-consuming to do all the research yourself. So here’s a list, including explanations, of all the hardwood flooring tools you’ll need for a successful installation. You’ll also find out how they’re used and get product recommendations.
We’ll discuss:
Tools to remove old flooring
Chances are, you’ll be removing existing flooring before installing your hardwood floor. It could be laminate flooring, engineered hardwood, carpet, vinyl flooring, tile, or old hardwood. If that’s the case, here are some tools you’ll need for that step of the job.
Chisel
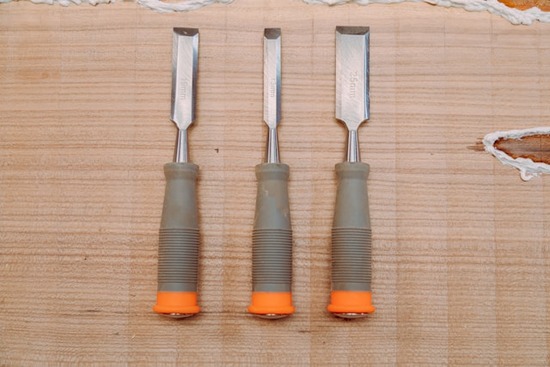
If there’s crusted lines of glue or old, hard bumps of drywall mud, you’ll want a chisel to scrape those off the floor. The subfloor needs to be as even as possible to avoid breaking the flooring, and to prevent squeaking or creaking in the boards later on.
Unlike typical woodworking chisels, for flooring you’ll want a chisel with a bigger edge, allowing you to cover more floorspace at once. Aim for one with a 3-5 inch edge, and a decent-length handle for leverage. Some good brands to look into are American Tools and Firecore, but probably most of this size will do an adequate job.
Crowbar
If you’re removing carpet, crowbars make excellent hand tools for removing tack strips. You don’t need a huge one—any mid-size pry bar will work. The brand also doesn’t matter as much with a simpler tool like this.
Level
Even if you remove all old adhesives, you need to make sure your subfloor is completely level. You certainly don’t want to get three rows into your install only to discover that one side of the floor dips downward!
Sometimes cupping can occur at the seams where plywood sheets meet. Or a shallow but wide patch of the concrete subfloor could be lower than the rest of the floor.
So use a level at several different locations on the floor to ensure the entire area is level. Almost any brand will do the job, though you may want to use a longer level for this type of project, since you’re covering a bigger area.
Concrete patch mix and sandpaper (or a sander)
The necessity of these depends on your type of subfloor and if it needs evening out.
If you have a concrete subfloor and tack strips ripped out small chunks of concrete, or you have other low spots, use a ready-mix concrete patch to even it out. Some good brands to try include Sika, Quikrete, or Rust-oleum, all of which can be purchased at your local Home Depot, Lowes, or hardware store.
You’ll need to allow a few days for the concrete to dry properly before starting the next step.
If you have a plywood or OSB subfloor, you may have to sand any uneven parts. This can be done with coarser sandpaper (between 16 and 60 grit for both types of subfloor) and a hand sander or a power sander (which will be much quicker). Likely, the places you’ll have to sand will be around the edges. If the middle of the sheet is significantly bowed or cupped in a large area, you may need to consider replacing the whole sheet.
If you’re looking into power sanders, look for trustworthy brands like Ryobi, DeWalt, Black & Decker, Bosch, or Craftsman. A random orbital sander might be your best bet, since you’ll also need it when applying finish to the new floor.
– – –
The above list of tools covered what is needed for removing most common floors. If you’ll be installing an engineered wood floor or another special type of flooring, there may be different tools you need that aren’t listed here. You’ll want to look up tools for your chosen type of flooring or talk to a flooring expert if you have questions.
Now let’s move on to tools you’ll need to install your brand-new beautiful hardwood floor.
Safety gear

While you’re using these tools, it’s also important to be equipped with the appropriate safety items for installing hardwood flooring.
Safety glasses are necessary when you’re cutting floor planks, sanding, or other similar things. Dust and debris can easily fly up and hit you in the face and eyes. And as an extra measure of precaution, many installers wear them throughout the whole installation process.
If you’re sensitive to dust or want to avoid accidentally inhaling small particles of wood or other materials, we recommend a dust mask or a respirator. If you’re ripping up old flooring, there’s always the risk of encountering mold or other air pollutants.
Ear plugs or muffs are recommended when working around power tools. They can be muffs or bullet-shaped foam plugs. Anything over 85 decibels (which includes most power tools like staplers, nailers, and saws) can damage your hearing.1
Knee pads can be helpful for all those hours you’ll be kneeling directly on the hard subfloor. While these aren’t the same level of necessity as safety glasses or earplugs, your bones and joints will surely benefit from avoiding extra strain or pressure!
When you’re working with splintery or rough pieces of wood, woodworking gloves or a pair of heavy duty work gloves will give you the hand protection you need.
And any time you’re working with heavy equipment or nails or other sharp objects, it’s a good idea to protect your feet with a good pair of work boots. Depending on your preferred level of protection, you may want to consider steel-toed or other safety-toed options.
Measuring devices
Naturally, installing any type of flooring requires a lot of planning, measuring, placing, and marking. Here are some tools to make sure you have on hand before you start.
Tape measure
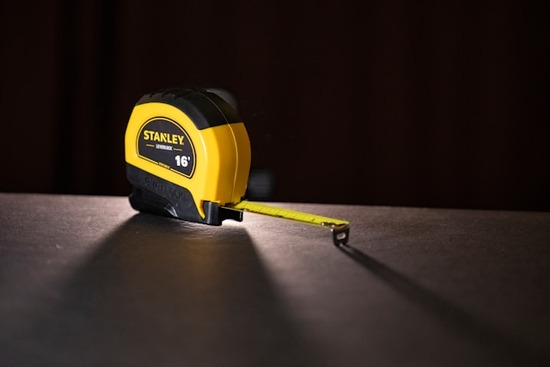
As you can guess, you’ll need this simple yet indispensable item throughout the whole process.
Any tape measure will measure an area, sure…but there are some other features that can come in handy during a flooring install.
Since you’re working with larger areas, it helps to use a tape measure with a 25-foot or longer blade.
Most brands can give you what you need, but Irwin, Lufkin, Stanley, and Milwaukee continually get good reviews for their higher-end options. However, it may be more helpful to shop by desirable features instead, such as a good auto-lock, longer stand-out, smoother snap-back, etc. You also might have preferences on blade width, material, weight, shape, etc.
Spacers
These are important for holding the expansion gap around the sides of your wall. Expansion gaps are small spaces, such as a half inch, between the flooring and the wall. This allows the flooring to expand with the changing seasons and as it settles (both of which it will do). Without expansion gaps, the flooring could cup, bow, or buckle from lack of space.
That’s why you’ll wedge these little blocks between the flooring and wall to maintain that gap while you work. You can make them yourself or buy them, but be sure to check your flooring before you do so you know what size you’ll need.
Chalk line
A chalk line, or a rolled-up string you pull out of a case with loose chalk, is a cheap, quick, and simple way to mark the position for your first row of floor boards.
Try not to overfill the chalk container before using it, otherwise it might jam up or create a rougher line. After the string is coated, make sure it’s taut between your two marks and pull straight upward to snap the line.
If you’re not sure which brand to get, Tajima, Irwin, and Stanley are consistently well-reviewed.
Moisture meter
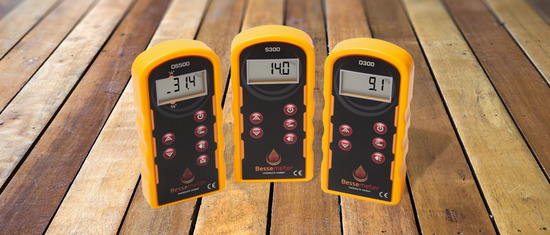
Along with tools for measuring physical distance, you’ll want to have a moisture meter in your toolbox for measuring the amount of moisture in the flooring planks.
Wood needs time to acclimate to the environment of your home, or it can cause damage later on. Boards will swell or shrink to match the moisture level of their environment, which can cause bowing, cracking, cupping, warping, or twisting.
And to make sure the floorboards are at an appropriate moisture level (6-9%) before you begin the installation, you need a moisture meter.
But not all wood moisture meters are created equal. Some have a much higher margin of error than others. And since you want a flawless floor for your home or office, you need to be able to count on the accuracy of its readings.
Cutting tools
Cutting floorboards is inevitable. Once you get to your last row of boards, it’s likely that your remaining space won’t exactly match their size. You’ll also have to cut them to work around door jambs and vents.
So here’s what you’ll need to have on hand:
Saw
Depending on what you have or like to use, this could be a:
- Miter saw
- Circular saw
- Jigsaw
As you can imagine, since we’re working with floorboards, something that creates smooth edges is a must.
For cutting around obstacles like outlets or vents, you’ll definitely need a jigsaw for custom shapes and angles.
You may be able to rent some of these saws if you don’t own them, but If you’re looking to buy, some of the best brands out there include:
- Bosch, Milwaukee, or Dewalt for miter saws
- Bosch, Skil, or Dewalt for circular saws
- Dewalt, Skil, Hart, or Craftsman for jigsaws
Featherboards
Featherboards aren’t necessary, but they can be nice as an extra measure of safety while cutting. These are small, special boards designed to keep pressure against the wood as you’re cutting it. They’re best for stationary saws, such as the miter saw, or table saws if you prefer to use those.
Some good brands to check out for featherboards include Benchdog, Milescraft, and JessEm.
Speed square
When you’re preparing to cut a floor board, you want a speed square to help you mark straight, level cut lines.
These simple tools don’t have to be anything fancy, so the brand isn’t extremely important. It will be more an issue of preference in material, size, weight, durability, or how many scribe notches you’ll want to use. But a few top-rated brands include:
- Swanson
- Mr. Penn
- Irwin
Fastening tools
These are the tools you’ll use for the actual installation process.
Rubber mallet and tapping block
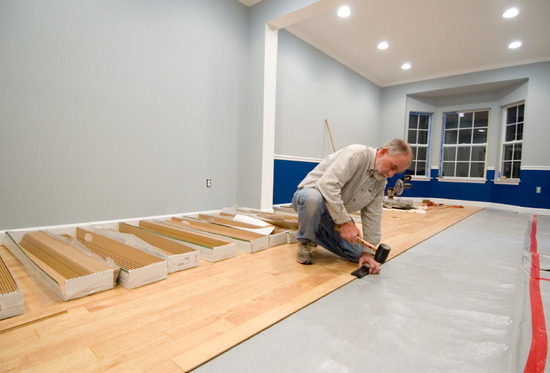
Once you have each floorboard in place, use the mallet and tapping block to gently fit the floorboard snugly against the others.
Unless you have specific preferences, brand or style of mallets and tapping blocks aren’t as important. You can even make a tapping block out of extra pieces of wood, although some manufacturers do advise buying one made for a flooring install to prevent damage to the tongue and groove.
Pull bar
A pull bar is an alternative to a tapping block. The end hooks around the new floorboard, allowing you to pull it snug against the others. Some prefer this method over the tapping block.
A pull bar can also be used to fit boards together tightly in places without much space (like against a wall). Here, a mallet and tapping block wouldn’t work well.
While pull bars are inexpensive and for the most part one is as good as another, a good all-around brand is Roberts.
Nail gun
You’ll need a nail gun to secure the flooring to the subfloor. And if you don’t own one, you may be able to rent one. Just make sure to review the flooring manufacturer’s specifications first.
You can use either a manual or pneumatic flooring nailer. Pneumatic nail guns use an air compressor and hose to propel the nail into the flooring. Manual nail guns, such as a ratchet or spring-loaded nail gun, require a slap from a mallet every time you place a nail. But they don’t require an air compressor.
If you’re renting, you may be at the mercy of whatever brands are available. If you’re buying, some good brands to look out for are:
- Milwaukee
- Metabo
- Vevor
Flooring jack
Flooring jacks are small tools, similar to pull bars, that are designed to fit floorboards in hard-to-reach places by either pushing or pulling.
If you’re working in a tight spot up against the wall, the flooring jack can brace against the wall. Using the ratchet, you can get the floorboards tightly into place against the others. It somewhat overlaps with a pull bar, so you may not need both.
A good brand to check out is Powernail’s Powerjack series.
Finishing nailer (or hammer and drill)
You’ll want one of these for that first row of floorboards, where the nail gun is too big and bulky to reach. The finishing nailer will be able to fit that close to the wall and get the nails in. It comes in both pneumatic and cordless.
However, these can be pricey. So if cost is a concern, you could accomplish this part of the installation with a good old-fashioned hammer and a drill. Always drill your holes before using the hammer and nails to avoid cracking and splitting.
Some good brands for finishing nailers include Milwaukee and Paslode. If you’re using a hammer and drill, you just want to make sure your drill bit size matches your nail size.
Finishing tools
Laying down the last board of flooring doesn’t mean you’re done with the installation. There are still a few last things to do to finish up. Here’s what you’ll need for this part of the project.
Random orbital sander
Before applying finish, the new floor must be sanded. With its random, patternless movements, a random orbital sander will reduce sand lines and shapes, making it better suited for the task than a belt sander or another straight sander. And you usually can’t go wrong with a Bosch, Black & Decker, or Milwaukee sander.
Shop vac
This is to clean up any sawdust, wood splinters, or other bits of grit and waste left on the floor. You need to be thorough here, since you will be applying finish to the floors. So while you could just use a broom, a good shop vac will ensure you’re getting all the smaller particles and pieces of debris.
Shop vacs can come in a variety of sizes and with different features, depending on your needs. So you can shop by combination of your desired bells and whistles among industry leaders like Hoover, Ryobi, DeWalt, Ridgid, and Craftsman.
Wood filler or putty
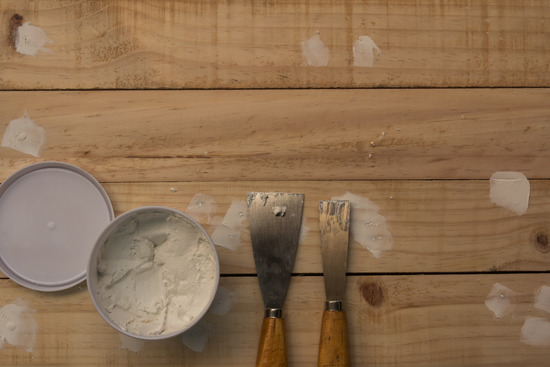
Some nails might leave small holes in the flooring or look a little unsightly. To cover these nails, you can fill the holes with wood filler. Simply dab a small amount into the holes until they’re filled and wipe away the excess.
The wood filler should match the color of your floors. Usually you can find a decent match at a big box hardware store, but sometimes the manufacturer will sell matching wood putty, so it’s worth checking there first.
Just make sure to match your finish type. If you have a water-based finish, opt for wood filler, which is also water-based. If your finish is oil-based, opt for wood putty, since it’s also oil-based. Minwax, Elmer’s, and Gorilla all make good quality fillers and putty.
Lamb’s wool applicator
You’ll need this to apply the finish to the floor (note that you don’t apply finish to an engineered hardwood floor). This is one of the best options because it’s very absorbent, so you don’t have to constantly dip it in the finish.
220-grit sandpaper or #000 steel wool
Either of these will work for after each coat of finish. The finish must be sanded before the next layer is applied, and with something not too coarse but not too fine.
When you’re working with sandpaper, be sure to use round strokes, not back and forth. The circular motion will decrease visible lines or streaks, especially on the final coat.
You’re ready to go!
When you’re tackling a DIY project like installing a hardwood floor, having the right flooring tools can make a big difference. Once you’re equipped with the items in this list, you’ll have the essentials on hand to get you through the whole project, start to finish.
Once you’ve finished your installation, the next step is maintenance.
- “Noise-Induced Hearing Loss,” National Institute on Deafness and Other Communication Disorders, March 16, 2022. (↑)
